Category Archives: Dairy-free
Thanksgiving family, friends & food; drooling over a seed catalog; a good/bad movie
- So, Thanksgiving was awesome. At one point, we had 21 people here — some watching football, some snoozing, some chatting over coffee and pie, kids running around and playing, spilling out into our courtyard, friends and family. Perfect.
 I made this recipe — Roasted Squash with Almonds and Cranberries — and it turned out so good. I’m definitely making it again, and I probably won’t wait until Thanksgiving; I LOVE root veggies. I used parsnips, carrots, and butternut squash. I baked it a little longer than recommended, and at 325°F because that’s just how it worked out with the other stuff that was in the oven at the time. I made it about 1/3 bigger than suggested, and wished I had MORE. Double recipe next time. I also chose not to add the lemon zest at the end. I guess I can’t make a recipe without messing with it.
 On Thanksgiving, my mom gave me a seed catalog that she said would be right up my alley. She was right. Pinetree Garden Seeds is located in Maine, so many of their selections are for much cooler, wetter, more northerly climates than here in the sunny desert. But, I can’t resist. I’m making a list and hoping for the best. They have all sorts of heirloom veggies, plus herbs for medicinal use and even plants for dying cloth. Lots of other stuff, too… I’ve been savoring the catalog, reading each description. The seeds are really inexpensive, too. So far, I have eight packets on my list, and the total is $10.30. And their shipping is reasonable, too: $3.95 for up to $19.99 in charges. I have this book on companion planting, too: Carrots Love Tomatoes. ~sigh~ Makes me want to plant stuff.
-

The ones at Home Depot are the identical brand, but MUCH cheaper -- about half the price.
I’ve been making my own cheapie windowsill seed starters for months: You need a paper egg carton and a foam one. Cut out the paper “egg cups” one at a time and place them in the tray of the foam one. Fill each paper egg cup with seed starting soil, and place in your windowsill. Absolutely free (except for the eggs!), but it’s easy to over-water (and thereby have water all over your windowsill), and they dry out really fast — no lid and all, and only 1-2 Tbsp of soil in each cup. So… at Home Depot, I bit the bullet and purchased a ready-made flimsy, plastic, effective 24-plant windowsill “greenhouse” seed starter, complete with peat pellets that expand like crazy. I now have lettuce, broccoli, and cauliflower sprouts happily growing on my windowsill. Bugs and birds seem to like lettuce and broccoli; I haven’t had great success directly sowing them into the garden. I haven’t tried cauli yet, but I figured if the birds like broccoli sprouts, they probably like cauli, as they’re in the same family…
 Only (maybe) tangentially related to the above — just because we had wine at Thanksgiving — I wanted to mention that if anyone saw my little post on Facebook that said I was going to watch the documentary Blood into Wine and were interested, you may want to reconsider. On one hand, the movie was REALLY interesting: lots of wry humor, the fascinating process of growing and making wine in Arizona, and the relationship between the major characters (Tool’s Maynard James Keenan and Arizona winemaker and ecologist Eric Glomski). I’m always interested in the… intersection of relationships. Meaning, the events that conspire to bring two people of really diverse paths together. I LOVE THAT. I think of it all the time, and if you meet me in real life, one of the first things I will likely ask you is what brought you, here. However, the movie was also full of f-bombs, sexual references, and way more all-out earth-worshiping religion than my husband was comfortable with. I could have hung with the movie, compelled by the good parts and filtering out the other… but after an hour, my hubby asked that we turn it off. And we did.
GFCF Turkey Stuffing (a sort-of recipe)
A friend just asked me for a recipe for stuffing. I don’t have one written down, but here’s what I do, and it is SO tasty. I always get compliments on this stuffing, even from those who don’t have to be gluten-free:
- Cook up some quinoa. Use 2 c. quinoa and about… three cups water, I believe. I always use less water than the package suggests. Set aside.
- Sautee lots of veggies: onions, garlic, mushrooms, celery, and sometimes other veggies, too, using a lot of olive oil (about 1/4 cup) and a fair bit of salt (1-2 tsp). This is just a suggestion, but I would use a whole, chopped onion; 6-8 cloves minced garlic; 5-8 oz sliced fresh mushrooms; and 1-2 cups chopped celery. Light-colored root veggies like rutabaga or carrots work well, too, as do cubed firm winter squash, like butternut. Steam those veggies — 2 cups or so — on the stove or in the micro until half-cooked, and stir into the sauteed veggies.
- When the veggies are almost done, add minced fresh herbs (often, around Thanksgiving, you can find combo packages that have several herbs inside) like sage and thyme…. Use at least 3 Tbsp minced herbs. Remove from heat.
- Then, combine quinoa with the veggies & herbs, and stuff that inside the turkey. You’ll probably have to lace up the turkey, because the quinoa stuffing falls out more easily than “normal” stuffing.
- For vegan stuffing, or for any stuffing that won’t fit into your turkey, bake in a well-greased bowl, covered, in a slow oven (325°). Bake at least 90 minutes.
- Keeps well for a long time in a warm oven, until you’re ready to serve!
Super-Simple GFCF Wholegrain Sandwich Bread (vegan, rice-free, potato-free)
In nearly nine years of almost daily gluten-free baking — both my recipes and countless others’ — this is the closest to bread perfection I’ve ever achieved.
- This recipe consistently produces a slicing bread that is fabulous right out of the oven. Go ahead and slather butter (or your spread of choice) onto a fresh, steaming slice; the bread does not gum up when trying to slice it when it’s still hot. (For honest disclosure, if you want VERY THIN slices, like ¼” thick, it is best to wait until the bread cools.)
- No more collapsed loaves!! The bread rises great and only falls/shrinks a VERY SMALL bit during baking.
- No more brick-like loaves: The top is actually ROUNDED!
- This recipe produces a nicely-browned, crusty, chewy crust.
- The taste is excellent — no overwhelming, odd taste. It’s subtle enough to use for both sweet and savory. Yet, it’s complex enough to not taste bland or dull.
- The texture is both sturdy and elastic: It stands up to spreading, but does not readily fall apart whilst eating the sandwich.
- The interior of the bread is moist (but never gummy), and not crumbly.
- The bread is also great for toasting (though unlike many other g.f. loaves, does not require toasting).
- It is 2/3 wholegrain, high in fiber, but is light in color.
- This recipe also produces a bread that is higher in protein than most gluten-free breads, more equivalent to wheat-based bread. The only starch used in this bread is mung bean starch (see the simple flour mixture recipe here), which is remarkably low-glycemic, due to its very high amylose content (32% amylose in mung bean starch, compared to 0.5% in corn starch).
Does this sound too good to be true?? Fair reader, it is not. I have churned out dozens of these loaves in the last couple of weeks, and have yet to be disappointed (unless I veered from the recipe in order to tinker with it, unsuccessfully).

Rising dough. This is actually a large loaf; it rises even BETTER in a small loaf pan.

Finished loaf.

Sliced bread. I like the top a bit more rustic, like this. If you smooth your loaf out more thoroughly, prior to rising, the top of your loaf won't be quite as irregular.
I have not tried to freeze it; we eat it too fast. I’ve only eaten it when the bread is up to two days old, so I really don’t know how long it lasts, long-term. If you make the bread and have any comments about preserving it, do let me know.
Another note: This bread works best in a smaller loaf size.
Super-Simple GFCF Wholegrain Sandwich Bread
(click here for a simplified comment-free PDF of the recipe; the following recipe is notated with suggestions)
Requires about 90 minutes’ time from start to finish.
- 3¼ cups Simple Sandwich Bread Flour Mix
- 1 tsp sea salt — not any less
- 1¾ cup water, heated to 95° – 110° F
- 1½ Tbsp granulated sugar (that is, 1 Tbsp + 1½ tsp)
- scant Tbsp active dry yeast (that is, about 2¾ tsp)
- 1½ Tbsp olive oil (that is, 1 Tbsp + 1½ tsp)
- Spray olive oil, or about an additional ½ tsp
- In a glass or glazed pottery container, add sugar and yeast to the warm water. Stir gently to moisten the yeast. Set aside to proof for ten minutes. At the end of 10 minutes, the mixture should have a fairly thick layer of small bubbles on top.
- Put the oven rack in the bottom third of the oven. Turn the oven on to preheat to 350°F for ONLY TWO MINUTES. Turn off oven.
- Line a small loaf pan (4½” x 8½”) with nonstick foil.
- With a whisk, combine flour mix with salt.
- To the proofed yeast mixture, gently mix in 1½ Tbsp olive oil. Add to flour and salt mixture.
- With a whisk, very quickly mix liquid mixture with flour mixture. Whisk briskly until well-combined and mixture thickens. You may still see some very small clumps.
- Set the bowl aside to rest for five minutes. After five minutes, whisk again until smooth. (Without the resting period and additional whisking, you will likely end up with small clumps of garbanzo flour in your finished loaf.)
- With a silicone spatula, turn batter into the lined loaf pan. Tap the pan on countertop to help it settle. Spray top of loaf with olive oil (alternately, lightly drizzle the loaf with oil). Using a clean silicone spatula, pat and form the loaf until the batter is evenly distributed and slightly rounded.
- Set the pan in the (pre-warmed) oven, uncovered, and close the door.
- Let rise for 20 minutes, remove loaf. Set aside, uncovered. (If your home is really cold, place the rising loaf in a protected area, like inside the microwave.) Turn oven up to 400°F and preheat for ten minutes. Place loaf into heated oven, on a rack in the bottom third of the oven, bake at 400°F for 30 minutes until nicely browned. (For an extra-brown, crusty crust, bake an additional 5 minutes.)
- After baking, immediately remove the loaf from the baking pan — place it on a cooling rack or a wooden cutting board.
- Enjoy!
- Store lightly covered on the countertop for up to two days. Beyond 48 hours, refrigeration or freezing is recommended.
NOTES:
- Using the prescribed Flour Mixture, which includes mung bean starch, is an absolute MUST for the bread’s success. I have tried nearly countless variations of potato, tapioca, and/or corn starch, in addition to numerous other flours — two kinds of millet, sorghum, three kinds of rice flours, potato flour — and NOTHING works like the combination of mung bean starch, oat flour, and garbanzo flour to allow the loaf to rise, and to produce the finished texture of both the crust and the interior of the loaf.
- Due to variances in humidity in both the air and in your flours, you may find that you need to increase or decrease the water used in the recipe. If the loaf does not rise well, increase water by 1 Tbsp. If it rises so much that it spills out of the pan and doesn’t hold a rounded shape well and/or if it caves in or flattens out a little either during or after baking, decrease water by 1 Tbsp.
- I have tried this recipe using raw milk (both cow and goat) in lieu of water, and it just works best with water. If you want to try milk, decrease the liquid by at least 1 Tbsp. The milk will make the loaf brown even more; keep a closer eye on the time. It also lends to a more yellowish color in the interior of the loaf, the color of potato bread.)
- If you want to use a large loaf pan, the bread simply won’t keep its loft as well while baking. However, it still is a serviceable, tasty loaf. Use 4¼ cups flour mix, 1½ tsp sea salt, 2¼ cups water, 2 Tbsp sugar, 2 Tbsp olive oil, 1 T yeast. Let rise and bake for an additional five minutes each. All other instructions are identical.
If you try this loaf and have questions or comments — positive or negative — PLEASE comment below or e-mail me at karenjoy@onlysometimesclever.com. I truly love feedback.
Karen the Farm Lady tantalizes you…

It tastes as good as it looks!
I’m finally 100% happy with my bread. Yes, it’s gluten-free, dairy-free, egg-free, rice-free, potato-free, vegan, made with this homemade flour blend. Now, I just need to post the recipe. But that takes a while. Saturday, maybe?? Monday?? Stay tuned. My friend Kim (of Gluten Free Real Food) sampled the bread yesterday, and she said it was really good. 🙂
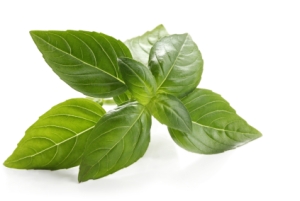
Yesterday, I turned all this basil (about ¼ of what I could have harvested from my garden) into little ice cubes, made by chopping washed leaves with a bit of olive oil in a food processor (a delightful, free hand-me-down from the afore-mentioned Kim), putting 1 Tbsp of the mixture into ice cube trays, and topping it with filtered water. It made 40 “ice” cubes, which I will happily add to soups, stews, sauces, etc., in the dead of winter, and think happy thoughts about my garden. I’m going to make some more this afternoon.

I look like an aging goober with really yellow teeth. Oh, well. At least I can grow some good basil.
I worked this morning in my garden, staking my tomatoes, weeding, and making a general assessment of overall garden health… I was going to plant more carrots, but Fiala, my almost-three-year-old “planted” the seeds in the family room carpet yesterday. I have determined that all — or at least most — of my garden problems were simply from the intense heat. The days are still hot — usually hitting 105° daily — but the nights are relatively cooler — in the 70s or at least the low 80s. Now,
- my Mexican Grey Squash are growing very nicely. I still haven’t harvested any mature fruit, but there are about six squash growing healthy and strong… At least 2-3 of them should be ready to eat in another week or so.
- My pole green beans have recovered from serious heat stress and are growing fresh green leaves and blossoms.
- There are a total six green tomatoes on my eleven plants — don’t laugh! Up until now, I have harvested ONE tomato, and it was really small. So, I’m really delighted about my tomato plants — growing more robustly in the last few weeks than they have all summer.
- I also have 7-8 volunteer tomato plants sprouting up… I’m not sure if I’m going to have room for all those tomatoes! We’ll see.
- My green chile plant is blooming nicely.
- My Hopi Pumpkin plant is absolutely taking over the world — it’s about 10′ x 10′, and now it is finally producing some green pumpkins which are NOT dying, but actually growing bigger. I hope I get to reap some before I grow terribly annoyed by the prolific/invasive grower and root it out.
- I have carrots that are growing nicely.
- Red chard growing nicely, too, though it seems like the bugs REALLY like it, so I’m going to have to spray it with some organic pesticide… (I bought Raid Earth Options chrysanthemum-pyrethrin-based pesticide because I had a buy-on-get-one-free coupon. For the record, it discourages bugs for about three days, and you can’t let any overspray hit bees, or it’ll kill them. And, a garden needs its bees!!)
I’ve put up ten quarts of pickles in the last week or so, using cucumbers from the CSA/farm share to which I belong. Four in the first batch, six in the second batch, which I canned this morning. The first batch was WAY TOO SALTY, because of some vague wording in the recipe I was following coupled with me not being sharp enough to figure out the error. The best part of the too-salty pickles is the cloves of fresh garlic I threw in. YUM. I’m going to have to pickle me some garlic!! In the new batch, in each jar, I used ½ tsp dill weed, ¼ tsp each brown mustard seed, coriander seed, and black peppercorns. No garlic this time — not enough to spare! I look forward to eating my not-too-salty farm pickles.
This last bit isn’t really farm-y or even food-y. BUT, I’m pleased with myself, because it is a cheap way to make my home more pleasant. 🙂 My sister, who teases me unmercifully on topics ranging from my horse teeth to my hairy toes to my crunchiness and everything in between (I love her dearly and she keeps me humble), bewailed my sadly scentless laundry. I explained that we couldn’t do scented detergents or fabric softener because of Fiala’s skin issues. When she mourned for me, it really got me thinking about ways I could make my laundry smell pleasant and fresh without hurting Fiala. A few weeks ago, I was at Trader Joe’s and noticed their filter-paper enclosed lavender dryer sachets. Voila! Perfect. The $3.99 price tag made me grumble, but four packets which each last 6-10 loads… I figured the package would last me a month. Well, my local natural foods market (Sprouts, which is taking over the West — you may see one near you soon! It’s a good thing.) is running a 25% off their bulk products this week. They have a lovely wall of half-gallon jars full of spices and herbs, and I thought, “I wonder if they have dried lavender flowers? I could make my own dryer sachets!” Turns out, they DO carry lavender! Even on sale, it was $13-something per pound, so I tentatively filled up my little plastic ziploc baggie with what I figured was more than enough to make four sachets to do a little price comparison. The total cost??? FIFTY TWO CENTS. That’s it. And when buying lavender as an herb, it was taxed at the grocery rate (1.8%) instead of the general merchandise rate (≈9.8%, depending on the municipality). And, I already have a little cotton drawstring bag that I’m planning on using. So, I’ll have my gently lavender-scented laundry now, at 1/8 the cost. Ha! I feel pretty good about that one. Because I get excited about weird stuff like that.
And now, this post is so long, I guess I could have used the time it took creating it to have done the bread recipe. ![]()
Summer Garden Beef Pot Roast (GFCF) recipe
I must say that after about nine months of composting, it is still very satisfying. It’s satisfying to mix in homemade compost into my garden, and satisfying that those veggie kitchen scraps are going to good use, and not just thrown in the trash.
I was thinking about that this morning as I was peeling carrots. 🙂
I was also thinking about a recent visit to allrecipes.com, a site which I really like, and seeing “recipes” for chicken whose sole ingredients were:
- A chicken
- Salt and pepper to taste
- 1 tsp paprika
That’s it. The recipe in question has received more than 1,000 reviews (average of 4.5 stars, out of 5), and nearly 71,000 people have saved it as a favorite. 😮
Call me a snob, but I just don’t consider that a recipe.
My sweet friend Daja blogged about this cultural phenomenon recently: Recipes that aren’t, which she entitled They just don’t make ’em like they used to, in which she contrasted old fashioned recipes with newer “recipes”.
Or how about this gem: specific instructions on spreading marshmallow cream and peanut butter on bread. Silly me, I thought that was something we didn’t admit to eating, not something we outlined in great detail.
Lots of good, fresh recipes on the site from which this pic was taken! The Seasonal Gourmet. Perfect.
So, anyway. I was thinking about all of this, considering whether or not what I was making this morning qualifies as a true recipe. I decided that, yes, it does, even though I almost never actually use recipes for dinner. I pretty much just buy what’s on sale and in season (and now, what I can reap from my garden, or what was in my weekly CSA basket), look in the fridge and assess what I have, and come up with a plan that matches what I have on hand. That’s what I did, this morning. Since it’s summertime, I used ingredients that I probably wouldn’t have on hand in the winter, like red bells, fresh basil, and zucchini. And, of course, if you’re going to make a pot roast in the summer, you must use a Crockpot. Heating up the whole house just makes no sense.
Here ya go:
Summer Garden Beef Pot Roast
serves 6-8
(click here for pdf: Summer Garden Beef Pot Roast pdf)
- 3-5 lb beef chuck roast, bone-in
- 8 medium carrots (about 1 pound)
- 1 red bell pepper
- 1 large onion
- 1 large zucchini (about 1 pound)
- 4 stalks celery, with leaves
- 1 – 28 oz can diced tomatoes OR about 3 cups chopped fresh tomatoes
- 2 Tbsp sweet California chili powder OR paprika
- 1 tsp dry, rubbed sage
- ¼ cup chopped fresh basil (about 10 – 15 large leaves)
- 8 cloves garlic, rough chopped
- 2 tsp sea salt
- ½ tsp fresh cracked pepper
- IF you have a very large (8+ quart) Crockpot, 3 lbs Yukon gold and/or red-skinned potatoes.
- Place the roast in the bottom of a 6 or 7 quart Crockpot (usually oval-shaped, rather than round). No need to cut it up.
- As you prepare each veggie, just throw it in, atop the roast.
- Peel the carrots and slice lengthwise. Cut each “stick” into 3-4 pieces.
- Core and seed the red bell pepper, cut into pieces approximately 1″ x 1″.
- Peel and slice the onion into about 16 sections.
- Cut the zucchini lengthwise into quarters and chop into pieces about ½” wide.
- Chop the celery into pieces about ½” wide. (Leave the leaves. They add more flavor! Or, just do what I do: Cut off the dried ends of a bunch of celery, then chop from there until you have about 1 cup of pieces.)
- Add the tomatoes, chili powder (or paprika), sage, basil, garlic, salt, and pepper.
- If you used canned tomatoes, add some water to the can to rinse out the remaining tomatoes and add to the Crockpot. If you used fresh tomatoes, add 1 cup water.
- If you still have room remaining in your Crockpot, cut each potato into 4-6 pieces and continue adding until Crockpot is full.
- Gently stir contents of the Crockpot with a wooden spoon (or just plunge your hands in and mix).
- Cook on low for 8-10 hours or on high for 6-7 hours until meat is fall-apart tender.
- If you added potatoes, you have a complete, one-dish meal. If you did not add potatoes, serve over mashed potatoes or rice.
- Enjoy!
Please Name This Recipe!!
I make this recipe (or an incarnation thereof) once every 2-3 weeks. It’s yummy, and as always, gluten-free. Currently, I have a crock o’ pinto beans simmering on a back burner of the stove top to accompany dinner tonight, and I’ll make some white rice, as well, to go with.
This dish is Mexican-inspired, but just saying “Mexican Crock-Pot Dinner” sounds really lame, so will someone please help me with a better title? I should probably offer a prize for naming this recipe. I don’t have one to offer. Maybe you could suggest a prize, too. 🙂 Once named, I’ll add this to my permanent page of GFCF recipes.
A note on the meat: As with most Crock-Pot dishes, a less expensive, fattier cut of meat works best for slow cooking. For best flavor and extra nutrition, I like bone-in meat, but then, you’ll be fishing the bones out as you serve it. I suggest chicken thighs or drumsticks (not chicken breasts), or just about any cut of pork, except sirloin. If the bones bother you, stick with boneless pork country-style ribs (which are not ribs at all) or boneless, skinless chicken thighs. I have also made this recipe with beef, but I think chicken or pork works best.
“Mexican Crock-Pot Dinner”
serves 8
- 3 – 4½ lbs. chicken or pork (see note above)
- 2 medium or 3 small onions, cut into eighths
-

I cook with Mexcian Grey Squash every week. Use like zucchini, but Mexican Grey has none of the bitterness that zucchini often has.
3 medium or 4 small Mexican Grey Squash or zucchini, quartered lengthwise and cut into ¾” pieces
- 8 cloves garlic, diced
- 1 – 28 oz can petite-diced tomatoes, undrained
- 1 – 7 oz can diced green chile peppers
- 1-2 tsp sea salt
- 2 Tbsp dried Mexican oregano (MUST be Mexican)
- 1 Tbsp ground cumin
- 1/8 – ¼ tsp ground red pepper (cayenne)
- Optional: 4 oz crumbled Mexican Cotija cheese
In a medium or large Crock-Pot or other slow cooker (mine is 6 quarts), combine all ingredients except meat. Add the meat, gently tossing to coat meat with some of the spices and juices. Set cooker to “low.” Gently stir once per hour, if possible, until the mixture has cooked 6-8 hours, or until meat is tender and falling off of the bone.
If you care to go through the trouble, you can use a slotted spoon to remove bones before serving. Or, just do what we do, and plunk the removable crock onto the dinner table next to the “bone dish.”
Serve over cooked white rice, sprinkled with Cotija cheese (or feta), if desired, with a side of pinto beans.
Other suggestions:
- For a Cuban twist, add the zest and juice of one orange before cooking, and serve with rice and black beans.
- If you have a very large Crock-Pot, add 1-2 lbs of soaked pinto or black beans to the bottom of the slow cooker. Mix the veggies & spices in a separate bowl and gently spoon the mixture on top of the beans. Top with the meat. The moisture from the meat and veggies should provide plenty of water in which the beans can cook, but if you want to be on the safe side, add an extra 1-2 cups of water.
- For added heat, try adding 1-4 minced canned chipotle peppers.
Simpli Gluten-Free Instant Apricot Oatmeal — Review

Simpli Gluten-Free Apricot Oatmeal
- Simpli Gluten-Free Instant Oatmeal is delicious. I loved it, as did my 9 year old son, Wesley, and my 4 year old daughter, Audrey. All of us have to be on a gluten-free diet, due to celiac disease. Some gluten-free products can run on the odd/nasty side, unfortunately. Not so with this one! For taste, it gets a hearty thumbs up from all who sampled it.
- I am in full support of the company’s aims to produce completely gluten-free oats, from seed to packaged product (more on that, later).
- And, with only four ingredients DONE RIGHT, Simpli Gluten-Free Instant Oatmeal is CLEAN food, which is important to me.
- The product is stellar.
However, I’m not sure I’m the best person to review it. Here’s why:
- I’m too cheap, and I want to buy locally. Currently, Simpli products are available online, through their website — http://www.livesimpli.com. Perhaps the ONLY good thing about living in a large city is the ready, local availability of just about anything I could want or need, gluten-free items included. I virtually NEVER purchase food items online, especially ones that are $4.95 plus $3.95 shipping ($8.90 total) for one 8.4 oz package of five packets of oatmeal. No matter how stellar a product, I absolutely cannot afford — even for a special occasion — to spend $1.78 for a small bowl of oatmeal. Although I rarely eat instant oatmeal, my children, when they eat it, use two packs at a time. So, realistically, you’re looking at a $3.56 bowl of oatmeal. Buying a bulk pack of nine boxes is slightly more economical — it works out to $5.70 per box, including shipping, or $1.14 per serving ($2.28 per double serving). Still. I would just never pay that. If Simpli was carried it locally, at my local natural-foods store, Sprouts, had their biannual 25% off of all gluten-free items, which would make it about $3.70 per box… I might consider that for a special occasion, like packing food for a trip whose destination may not have g.f. foods readily available.
- I like thick-cut oats. I’m just not a fan of the gooey consistency of any instant oatmeals. I like some chew and heft to my oats, which is why I love Bob’s Red Mill Gluten-Free Rolled Oats, a pantry staple of mine. However, those take (according to the way I make it, not according to package specifications) eight minutes to cook, after the water has boiled, so a good 12 minutes cooking time, plus about five minutes of sitting time… so, 17 minutes or so, from start to finish, versus about four with Simpli Apricot Instant Oatmeal. In other words, I understand that, given the nature of instant oats (thinner cut), they’re just not going to turn out the way I like them… so it’s not a flaw in the product; it’s just a difference of opinion, values, and texture. Also, returning to the “I’m too cheap” mantra, I buy Bob’s Red Mill Gluten-Free Rolled Oats locally for about $5.50 per 2 lb bag. That works out to $0.34/oz for Bob’s vs. $1.06 per ounce for Simpli — THREE TIMES THE COST — when Simpli is purchased online. And Bob’s Gluten-Free Oats aren’t cheap!!!
With those caveats, let me reiterate that Simpli Gluten-Free Instant Oatmeal is delicious. As stated above, I like my oats with a little more heft, so I don’t prefer the texture of any instant oats, and don’t regularly eat instant. However, that’s not Simpli’s fault. Judging by taste — it’s perfect. “Bright” is the adjective that comes to mind. The apricot flavor REALLY shines through beautifully. With only four ingredients — Oats, apricots, sugar, and salt — I was wondering how they would be able to make the apricots tender enough. Simpli’s solution? Mince them. Mince them teeny, teeny, tiny. That way, they rehydrate perfectly, and the apricot flavor is broadcast through each bite.
Also, Simpli Gluten-Free Instant Oatmeal is not too sweet. I think it’s perfect. There are only 10 grams of sugar per 48 gram packet, and much of that, I’m sure, comes from the apricots themselves.
The instructions on the box call for 2/3 cup boiling water, stir, and let sit for one minute. I knew I was reviewing the product, so when I made a bowl for myself, I made sure I followed the instructions to a “T”, including using a measuring cup for the boiling water (something I would never normally do), and setting the timer for that one minute. Based upon that, I would suggest that, unless you want some soupy oatmeal, you should EITHER use less water (say, 1/2 cup), OR you should let your bowl sit for a good 4+ minutes, to let it thicken.
About the gluten-free aspect: Simpli takes it seriously. I’m slightly bummed that this oatmeal is a product of Finland, but perhaps that’s the only place where they could ensure that the oats would grow and be processed according to their exacting specifications. Although I can occasionally be somewhat lax about cross contamination, I’m a stickler for g.f. oats. I get asked frequently about why, if oats are technically gluten-free, does one need to buy GLUTEN-FREE OATS. I explain that there are so many chances for cross contamination in the grain-growing, harvesting, storing, and processing process that unless a producer is intentional about maintaining the gluten-free aspect of his oats, you, as the gluten-free consumer, are almost guaranteed to consume gluten if your oats, if they’re not certified gluten-free. This graphic, from Simpli, illustrates it so well:

SO!
All of that to say that Simpli Gluten Free Instant Apricot Oatmeal is a fabulous product. But, I hope it’s coming to a store near me, because I will almost certainly not be buying it, otherwise.
Maybe this is the opposite effect of what Simpli anticipated, sending me a free package to review, but this product has inspired me: I think I’m going to purchase a package of Bob’s Red Mill Quick Cooking Gluten-Free Oats, and make up my own packets of instant oatmeal, and just place them in Ziploc sandwich bags. If Simpli can create a simple instant packaged oatmeal, so can I!!
Vegan Reduced-Sugar Maple Pumpkin Pie (GFCF)
I was inspired by this recipe, on Affairs of Living. However, the author sweetens her pie almost exclusively with stevia. I enjoy stevia in moderation, but I don’t particularly enjoy the flavor of an item — especially a dessert — which relies heavily on stevia. I am making an increasing effort, though, to minimize our family’s consumption of refined sugar. Accordingly, my recipe below calls for very little sugar, but it does call for some. I also modified a number of other ingredients from the original recipe. The results obtained a thumbs-up review from all of my children and my husband, who is quite the pumpkin pie aficionado. Everyone said that the coconut flavor was undetectable, and that the texture and flavor is perfect. I was particularly pleased that this pie stays “rigidly” custard-like when cut. In other words, the slices of pie retain their shape, and do not collapse on the plate.
A few ingredient notes:
 Agar-agar powder: Invaluable for egg-free “creamy” goods like custards and pies, and vegan “gelatin” desserts, this inexpensive ingredient is readily available in Asian markets. I typically buy Telephone brand, which is around a dollar for a 0.88 oz packet.
- Coconut cream: Much thicker than coconut milk, and much higher in fat content, it resembles softly whipped cream upon refrigeration. Coconut cream makes this
 vegan pumpkin pie both lighter in texture and lighter in color than many dark, dense vegan pumpkin pies I have tried in the past. I was tickled to find a brand — again, in the Asian market — called Kara, which is in a tetra-pack (unrefrigerated carton), and has NO PRESERVATIVES. It’s inexpensive, too — $1.99 for 500ml, or $2.99 for a full liter.
 - Stevia: I use powdered, concentrated extract (purchased from Trader Joe’s — $9.99 for a 622-serving, 1 oz container).
- Mace: If you do not use mace regularly, please start now!! It is a spice similar to nutmeg, but lighter and more complex. I adore mace.
- Pumpkin: I made this recipe with home-cooked squash purée. The pumpkin I used, though supposedly good for cooking, was disappointingly watery and fibrous. Many home-cooked squashes are much more watery than canned pumpkin. If, indeed, you start with fresh pumpkin, make sure you use a food mill or something similar, to yield smooth puree. If it is watery, do like I did — place it in a cheesecloth-lined strainer, and let the water drip out, which will result in thick, no-liquid purée.
A note about crusts: There are a blessedly increasing number of commercially available frozen gluten-free crusts. I am too cheap to buy them, however, and always struggle with uncooperative homemade g.f. pastry. Use an unbaked crust for this recipe. Since it cooks at a high temperature, if you are using a “normal” wheat-based crust, you will almost certainly have to use a pie shield to protect your crust from burning (g.f. crusts are typically less-prone to burning). You may want to try Affairs of Living’s Gluten-Free Crunchy Pie Crust. I’m going to be trying it myself, when I make pie again in a couple of days, as well as “standard” gluten-free pastry crust.
So! With no further ado…
Vegan Reduced-Sugar Maple Pumpkin Pie (click for printable pdf)
makes one 9″ pie
- 3 cups pumpkin purée
- ¾ cup coconut cream
- ¼ cup pure maple syrup
- 2 Tbsp dark brown sugar
- 2 level 45mg scoops stevia extract (or 4-6 drops of liquid stevia)
- 1 tsp agar agar powder
- ½ tsp sea salt
- 2 tsp gluten-free vanilla extract
- 1 ½ tsp cinnamon
- 1 tsp ground mace
- ½ tsp ground ginger
- 1/8 – ¼ tsp ground cloves
Preheat oven to 400°F.
Prepare an unbaked 9″ pie shell.
Beat together all ingredients until light, smooth, and well-incorporated. Spoon into the prepared pie shell, using a silicone spatula to level and smooth the filling.
Bake for 1 hour and 10 minutes, using a foil pie crust shield (or a purchased silicone or aluminum shield), if necessary, to keep from over-browing.
Cool completely at room temperature before cutting.
Enjoy!
Fresh Ginger-Roasted Yams
I love yams. Not the goopy, syrupy yam sludge that is an unfortunate mainstay of American Thanksgiving meals. But real yams, cooked in a healthy and appealing way.
 Well, what makes a “real” is a subject of much debate. Is it a yam? Or a sweet potato? My favorite is a Red Garnet, which I guess is technically a sweet potato.
We eat yams year-round, and I have cooked them in just about every way imaginable. Often, I cube them and toss with LOTS of ground allspice, a teensy bit of brown sugar, salt and Earth Balance Soy-Free (which is the most buttery non-dairy “margarine” on the market, in my opinion). This is my 9 year old son Wesley’s favorite dish of all time. Recently, though, I made a dish that was a bit of an experiment. I was so tickled with the results that we will surely be seeing it on the Thanksgiving table, if not sooner.
One note about cooking temperatures: You can roast yams at just about ANY temperature. One reason I bake them so often is, no matter what the temperature at which my main dish is cooking, I can throw a casserole dish of yams right alongside of it, and the yams turn out fabulous. They are nigh impossible to burn or overcook, particularly if you’re using very little (or no) sugar. They can sit for hours in a warm oven and stay wonderful. If you are baking them (or warming them), don’t stir frequently, unless you want mashed yams! When I made the recipe below, I was roasting a turkey (another “holiday” dish we eat year-round) at 325°F, and cooking time for the yams ended up being about 90 minutes. However, you can roast yams at up to 450°F, which will likely decrease the baking time to about 40 minutes.
Fresh Ginger-Roasted Yams (click for printable pdf)
Generously serves 6-8
- 3 medium-large yams (about 4 pounds), peeled and cut into 1/2 – 3/4″ cubes —
- 1/4 cup butter, butter substitute, or olive oil
- 2″ section of fresh ginger root, peeled and finely grated
- 2 Tbsp dark brown sugar
- 1/2 tsp sea salt
Preheat the oven to 325°F (or hotter — see note above).
Place cubed yams in a medium-sized mixing bowl.
In a microwave-safe small bowl, melt the butter. Drizzle the melted butter over the yams, and toss (or stir with a silicone spatula). Add the finely grated ginger root, brown sugar and sea salt and toss until the ginger is evenly distributed.
Place the yams in a 2-3 quart covered casserole dish and bake until tender, testing with a fork after one hour. Depending on the size of your casserole dish, the yams will be completely cooked in 60-90 minutes.
NOTE: After you have placed the yams into the casserole dish, resist the urge to stir. This dish produces roasted cubed yams, and if you stir, they will mash easily, especially after they are done or nearly done baking. When they are completely cooked, the yams will loose their cloudy appearance, and turn a deeper, more saturated color.
Pancakes (Vegan, gluten-free, corn-free, rice-free)
Yes, these are vegan, so there is no dairy, and no eggs. And, they’re whole-grain, which is all the rage these days.
But, are they any good? Yes. Yes, they are. I started making these pancakes for my youngest daughter, Fiala, who has some serious dietary restrictions. But, when the rest of my family found out that these were not only edible, but tasty, everyone wanted some. Now, when I make these, I make ’em for everyone. They stand up well under butter (or butter substitute of your choice — we love Earth Balance Soy-Free), real maple syrup, and jam. This last Saturday, I made a faux Chatilly Cream topping with Tofutti’s Sour Supreme, vanilla, cinnamon, and powdered sugar, which we dolloped on top of our jam-filled pancakes.
Beware “light” syrups — I haven’t tried any on these (I don’t buy them!), but I think the water content would make these pancakes soggy.
Normally, I like my pancakes fluffy. But, once I concluded that I was just never going to get a FLUFFY result while taking out dairy, egg, rice, potato, and corn, I was content. So, the resulting product is a little thicker than a crepe, and a little thinner than your standard pancake. The good news about that, though, is that they cook in a snap.
They are also a tad darker than most pancakes, given the flour content. And, speaking of dark, you cannot omit the sugar, or you will end up with… flatbread that doesn’t look like a pancake, because it won’t brown.
But, if you can hang with all of that, you can make these easy, tasty pancakes!
They are also high-protein and compared to similar products, very low carb. Per good-sized pancake, they contain:
- 4.8 g protein
- 2.4 g sugar
- 3.0 g fiber
- 23.8 g total carbohydrates
Vegan Pancakes
Makes 10
- 3 Tbsp dark brown sugar
- 2 cups oat flour (no substitutions)
- 1 cup garbanzo flour (no substitutions)
- 1/4 cup olive oil (or other oil)
- pinch of sea salt
- 2 cups water
- Optional:
- 1/2 tsp cinnamon
- 1 tsp vanilla
- 1-2 scoops (45 mg each) pure stevia extract
Combine all ingredients and whisk until smooth. Batter will very likely have small lumps (from the garbanzo flour). Let the batter sit 5-15 minutes, and whisk again. After sitting and re-whisking, the batter will have thickened slightly and be very smooth.
Right before cooking, add:
- 1/2 tsp baking soda
Whisk thoroughly, but do no over-mix. Lightly oil a griddle (I use olive oil on a seasoned cast iron griddle), and heat over medium-high heat. Use 1/3 cup of batter at a time. Cook approximately 40 seconds per side, flipping when top is bubbly, sides are slightly dried out, and bottom is well-browned.
Use within 48 hours, or freeze unused portion, separating each pancake with a sheet of waxed paper.


