GFCF Wholegrain Sandwich Bread
Click here for a simpler breadmaker wholegrain GFCF bread recipe.
A while back, I blogged about my lack of success in making gluten-free sandwich bread. It seemed like no recipe I tried or created was successful, especially after our family also became casein (dairy) free, and double-especially, since I was looking for a recipe that uses a lot of whole grains. A fellow gluten-free blogger, Carrie, at Ginger Lemon Girl, read of my plight, and referred me to a recipe she had recently created. As I read her highly-detailed post, my hopes rose.
Carrie, like me, is the sort of cook (and baker) who would rather use a LOT of ingredients to get a perfect result, instead of trying to use the fewest, resulting in a product that is simply edible. Though her recipe used a host of ingredients, I had all but one (millet flour) in my pantry. I quickly bought some millet, and set to work.
The only problem was that Carrie doesn’t need to avoid dairy, and her recipe contains nonfat powdered milk. I thought, “Well, I’ll just substitute rice milk powder!” I tried that. The results: Beautifully crusty, tasty bread with marvelous texture that absolutely caved in the middle upon baking. The loaves simply imploded.
But, even with its sunken center, the bread itself was by far the best-tasting GFCF bread that I’d ever tried. So, I thought I’d tinker with it until I could get bread that stayed “puffy” as it baked.
You should see my printed copy of Carrie’s recipe. It is covered with pencilled notes that are variously crossed out or circled. After about TWELVE attempts over six weeks, slightly modifying ingredients and/or procedure each time, with varying degrees of success, I finally hit upon the right combination!! I cannot express how absolutely thrilled I was.
Here’s a rundown of what I changed:
- First, in order to make two large loaves, I multiplied Carrie’s recipe by one-and-a-half times.
- In lieu of the dairy milk powder, I use a smaller amount of rice milk powder PLUS a bit of rice protein powder.
- I increased the amount of yeast used.
- I decreased the amount of brown sugar.
- I decreased the amount of water.
- In lieu of Smart Balance margarine, I use Butter Flavored Crisco (which IS casein-free).
- In lieu of Bob’s Red Mill (yellow) millet flour, I’m using dark/”black” millet flour, also called bajri flour. I’m certain that the recipe would be successful with either choice.
Why those changes? Well, taking out the dairy milk powder decreases the protein. Adding plain rice milk powder adds too much sugar. And, for whatever reason, if I used Carrie’s amount of liquids, the end result would be tasty bread whose top caved. Also, Butter Crisco has no actual liquid (unlike most other margarines), and baked goods made with Butter Crisco tend not to spread as much.
So… Though the resulting loaves, using my modified recipe, are slightly gnarly on top, they work. Also, the resulting bread slices aren’t quite as pliable as Carrie’s bread, both likely due to the lower moisture content. But, the bread still browns beautifully, is wonderfully crusty, slices as thick or as thin as you please, tastes AWESOME (even on day 2 or 3), makes great sandwiches, toast, french toast, and whatever else you’d like to do/make with the bread. It is pliable, tender — not soggy — and filled with beautiful air-pockets. It is simply the best GFCF bread I’ve ever had, and lemme tell you, I’ve tried a LOT of recipes.
After you’ve tried the recipe and fallen in love with it, as I’m sure you will, consider doing what I’ve done: Get out some quart-sized freezer bags, and while you measure the dry ingredients into your bowl for baking, measure all the dry ingredients into your freezer bags as well. That way, you’ll be able to simply pull a bag of dry ingredient “mix” from the freezer, add in the leavening and wet ingredients, and within 20 minutes, you’ll have your loaves rising in the oven. The last batch I did, I filled seven quart freezer bags. Since five of the six of our family members eat gluten-free and/or casein free, I EASILY go through four loaves in a week. Most every week, I make two batches, and it saves a ton of time by simply pulling out a bag from the freezer.
I also highly recommend that you view Carrie’s original recipe post, which has more pics, and a description of why some of the more unusual ingredients are necessary.
NOTE: Today (07/16/08), I made this bread again… I recently read on a “regular” bread-making site that if bread rises, then falls during baking that it is often from rising too quickly, at too high of a temp. So, today, I had the bread rise at room temp. While the tops didn’t cave, it took 1 hr 20 min just to rise to the tops of the pans, and overall, just didn’t seem to rise as much as using the rising in an oven that’s been heated to 170*, as described below.
If you make this bread, PLEASE comment and let me know of your results. If you modify the recipe in any way — especially if your modifications are successful — please comment on that, too.
Printer-Friendly PDF Version (This is a bare-bones, printable version, no pics or graphics.)
GFCF Wholegrain Sandwich Bread
Dry Ingredients:
- 1 1/2 cup brown rice flour
- 3/4 cup white rice flour
- 3/4 cup sorghum flour
- 3/8 cup millet flour, black or yellow (3/8 cup is is the same as 1/4 cup + 2 Tbsp)
- 3/8 cup potato starch
- 1/4 cup ground flax seeds
- 1/4 + 2 Tbsp rice milk powder
- 2 Tbsp rice protein powder
- 4 1/2 tsp xanthan gum
- 1 1/2 tsp unflavored gelatin
- 4 1/2 tsp Sure Jell (pectin)
- 3/4 tsp salt
Leavening Ingredients:
- 5 1/2 tsp active dry yeast
- 1 tsp brown sugar
- 1/4 + 2 Tbsp warm water (105* – 110* F)
Wet Ingredients:
- 1/4 cup + 2 Tbsp Butter Crisco (Butter-flavored Crisco IS GFCF)
- 3 Tbsp brown sugar
- 1 1/2 tsp apple cider vinegar
- 3 eggs, room temperature
- 3 egg whites, room temperature
- 1 1/2 cups warm water (105* – 110* F)
Directions:
- Heat oven to 170* and turn off immediately, keeping the door closed.
- Prepare pans: 2 large (5″ x 9″) bread pans, or two small (4″ x 8″) bread pans PLUS six muffin cups or 16 mini muffin cups (for dinner rolls). Spray with oil or line breadpans with nonstick aluminum foil.
- In a large bowl (or the bowl of a stand mixer), thoroughly whisk together all of the dry ingredients. Set aside.
- Proof the yeast: Mix together the leavening ingredients, set aside. It should become aromatic and bubbly.
- In a medium bowl, microwave the Butter Crisco until just melted (appx. 25 seconds in the microwave). To the melted Butter Crisco, add the 3 Tbsp brown sugar, apple cider vinegar, eggs and egg whites. Whisk to mix well. Mix in the 1 1/2 cups warm water and all of the leavening ingredients.
- Gently pour wet ingredients into dry ingredients. For a stand mixer: Mix dough with paddle attachment for 5-8 minutes, scraping down the sides of the bowl with rubber spatula occasionally. By hand: With a sturdy wooden spoon, mix dough at least 100 strokes, scraping down the sides of the bowl with rubber spatuala 2-3 times. Dough will be quite thick. (If mixed in a stand mixer, the dough and resulting loaves might be smoother than mine; I mix by hand. I’m asking for a Kitchen-Aid for Christmas!!)
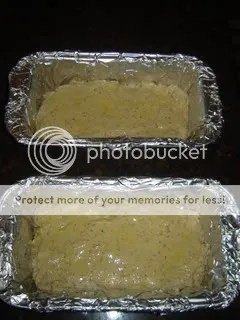
- For large loaves: Spoon as evenly as possible into prepared large loaf pans. Smooth top with rubber spatula, and firmly tap breadpans on countertop to settle the dough. Spray two pieces of plastic wrap with oil, and place atop the pans, oil-side down. Set in oven to rise for 1 hour.
- For small loaves and dinner rolls: Into a pastry bag with no tip, place about 1 1/2 cups of dough. Pipe into prepared muffin tins, filling level with the top of tins. (A pastry bag isn’t required, but rolls will look quite gnarled if you choose not to use a pastry bag.) Spoon rest of dough into the small loaf pans. Pans will be just shy of half-full. Smooth tops of loaves with rubber spatula, and firmly tap breadpans on countertop to settle the dough. Optional: Brush tops of dinner rolls and small loaves with one beaten egg. (NOTE: Since large loaves get quite brown upon baking, you don’t want to do this for the large loaves, which bake longer.) Spray two pieces of plastic wrap with oil, and place atop the pans, oil-side down. (No need to cover the muffin tins.) Place in oven to rise. Let the dinner rolls rise 25 minutes. Let the small loaves rise 45 minutes. (After the dinner rolls rise completely, you can remove all the pans from the oven, and proceed to step 9, baking the rolls as the small loaves rise for an additional 20 minutes atop the oven.)
- Remove pans from oven. Gently remove plastic wrap from loaves. The loaves will have risen just over the top edge. Heat oven to 350* F. For large loaves, bake 45 minutes. For small loaves, bake 35 minutes. For dinner rolls, bake 20 minutes. Bread/rolls will not rise further upon baking. After baking, turn out, and cool on racks.
- Bread slices more cleanly when loaves are completely cooled. For best results, use a serrated bread knife.
- Store lightly covered on countertop, for up to three days. If it takes you longer than that to go through a couple of loaves, consider freezing one loaf right away, then thawing it at room temp. After three days, place remaining bread in fridge, though the bread loses some of its pliability after refrigeration.


Dinner rolls, done baking, one non-piped gnarled roll in lower RH corner.

Small loaves, done baking

Small loaf, sliced open
Enjoy!!
Posted on July 8, 2008, in Celiac Disease, Cooking/Baking/Food/Recipes, Dairy-free, GF Recipes, GFCF, GFCF Recipes, gluten-free, Gluten-Free Blogfriends and Resources. Bookmark the permalink. 23 Comments.


I’m so excited to try this! Thanks for posting. I haven’t experimented enough with GFCF baking to figure out all this substituting! I have all the ingredients except the rice milk and protein, so once I track those down we will be trying this one out! Thank again!
You gave me some good thoughts to try with mine — I’m on CF version number 8 of Carrie’s recipe and still tinkering. I’m not sure I’ll be able to read my recipe this time around because I’ve scribbled, crossed out and added so many notes *sigh*
I’m really wanting to come up with a version that I can use almond meal in ( I know your family can’t do tree nuts, they are a great protein option for our family). My last version had a great flavor and texture but just didn’t rise the way I had hoped.
I loved your idea about measuring out freezer bag mixes! I think you need to change your blog name — you’re clever more often than you give yourself credit for 😉
Jami ~ Please let me know how it turns out!
Michelle ~ I miss almond meal. Coconut macaroons with almond meal… Yum! Same as you: I kept coming up with results that had “great flavor and texture but just didn’t rise the way I had hoped.” I hope my results, combined with your own, give you some GFCF dream bread!! And, :blush: Thanks for the compliment.
I am SOOOO glad you were able to tweak this recipe to work for you!! I LOVE the rolls you made with it! TOO utterly cute! I have to try that! I love the piping idea!! I’m going to try to do a post soon about how exactly how to bake a loaf of bread, fingers crossed it won’t fall! lol My last batches didn’t fall, but they didn’t rise beautifully either! Sometimes ya win, sometimes ya don’t! 😉 That’s good info about the bread rising at room temp. I’m wondering about letting the bread rise in the fridge overnight and then baking it in the morning. Have no idea if it will work with GF bread, but I’m gonna try! I love experimenting!
PS… I LOVE the rumbly tops of your loaves! I think it looks very artistic and homey!! LOVE it!!
Carrie ~ Yeah, I think if I had let the loaves rise longer than 1 hr 20 min at room temp it would have worked fine (as it was, they were just didn’t have ALL the loft I wanted). I think I just lost patience. So, it might work in the fridge overnight. I’m glad you like the rumbly tops!! I’m not totally unfond of them, but I wish they were a wee bit smoother. But, I can’t quite pipe a whole loaf to get them smooth like the dinner rolls!! 🙂 I’m wondering if I had a KitchenAid, or some other stand mixer, where I could mix them for longer, if they’d turn out smooth. IDK.
I’m on the hunt for sandwich bread that’s CF and SOY free..the Crisco has soy. I found one recipe for the bread machine but the loaf is just about impossible to use as normal sandwich bread because of its size and shape. I’d like one the goes in a loaf pan. Anyone have one?
Jaime ~ Is it a soy allergy? Or soy intolerance? Often, with a soy intolerance, the oil is tolerated very well; it’s the protein that almost always causes a problem with intolerances. That said, there’s NO WAY I’d eat wheat germ oil, so I totally understand if that would be unacceptable to you. But… the oil should be safe. You may also try Spectrum Nonhydrogenated Shortening, made from organic palm oil (which is semi-solid at room temp). Or, you just may want to try some other acceptable oil. The butter-flavor Crisco is just to impart a rather buttery taste; not much oil is used in the recipe, and what IS use, is melted. So, other oil should work.
Hope that helps!
My son’s allergic to dairy and soy..can’t have any trace of it. I’m new to finding recipes so any help is very welcome. What other oils can I use? I heard that people use apple sauce in place of oil or milk in some recipes, will it work here?
Hi Karen,
I live in a high altitude location. I am contemplating trying this bread, but the task is daunting. Do you have any tips for high altitude bakers?
Also, can you substitute sorguhm flour?
Thanks!
I don’t live at high altitude! I’m at 1200′. But, from what I’ve read, when at high altitude, you may need to add more liquid, but it seems really unclear about how much more to add, and extra liquid in a g.f. recipe is a recipe for disaster… Or, you could mix all the dry ingredients, then take out 1/4 cup, or 1/2 cup… You might need to experiment. The time to rise should go much more quickly… but that you may want to let it rise to the right height, then “punch” it down in the pan with a greased silicone spatula, and let it rise again.
http://www.swcoloradohome.com/articles/food/020114_b.asp
Hope that helps!!
Thanks Karen! Do you happen to know if Sorguhm flour can be substituted? Is it just for flavor or will it mess up the recipe if it’s substituted? Also, what would be a good substitution, if any?
Thanks.
This looks awesome. Considering I think I have a really well stocked pantry, there are several things here I have never used. I have also never seen foil used like that before. I am going to try that next time. Clearly, you are the baking master. Love the tips. I do the same thing with the freezer bags. Huge time saver.
This sounds a bit complicated for me but I’m still going to try it. I’ll maybe try it with the sauna method to see how that goes, but not sure how that works with yeast recipes. I know it gives excellent moisture and helps non-yeast breads to rise well. I guess I’ll consider it an experiment 😉
Alicia ~ Do you have a breadmaker? I recently developed a MUCH simpler GFCF wholegrain sandwich bread recipe for a breadmaker. I haven’t gotten around to posting it, mostly because I want to post it w/ pictures and my camera died!! But, I will e-mail you the recipe, if you’d like.
Another dairy and soy free option is Earth Balance’s new soy free margarine free spread. We are enjoying it as a replacement for most butter/margarine/shortening.
Oh… And DariFree powder in place if dry milk or rice powder.
I posted a modified version of this over at Eat.Drink.Better. 🙂 I added a few more seeds, used Earth Balance Soy Free (and I’ve also used olive oil successfully), omitted apple cider vinegar (for no reasons except I was out), used DariFree powder in lieu of powder milk or rice powder (packed full o’ good stuff!) and used tapioca starch instead of potato.
http://eatdrinkbetter.com/2009/07/07/gluten-free-whole-grain-bread/
Hi Karen, I stumbled upon your blog a few ays ago and made the sugar cookies which are fabulous! Now I am trying the bread, but I am having an enormous difficult time finding the rice milk powder. Is there a substitute for that item. I know I can order online, but Iwould like to go local if possible.
Thanks, Melinda
Melinda, you may get away with just omitting it altogether! I’ve been experimenting with a new recipe and it uses no milk nor milk substitute — just water — and the results don’t “miss” the milk at all. It may, however, mess with the sugar ratio, and the amount of dry ingredients… I would try upping the brown sugar to 3 Tbsp, and adding 1/4 cup to one of the flours.
OR…. you can wait for my new recipe!! It’s simpler, actually, and it’s still a wholegrain recipe. (GFCF as well as rice-free and corn-free.) I literally have batch/try #11 rising right now as I type. I hope to have it posted within a week.
Thanks so much Karen, I really want to try it before Easter so I can have some bread for my daughter on Easter Sunday.
I will await the new recipe also, your blog is better than all of the cookbooks that I have spent a fortune on. Thanks for giving us moms the time you spend in tweaking recipes.
Pingback: Gluten Free Whole Grain Bread - Zidee.com
Pingback: Simple GFCF (Half) Wholegrain Bread for a breadmaker « Only Sometimes Clever